Chainlist MetaMask TechEduByte: Easy Guide and My Experience
When I first started exploring Web3 tools, I kept hearing about something called Chainlist and how it works perfectly with MetaMask. At first, it sounded a bit technical like RPCs, chain IDs, networks but once I tried it myself, I realized how simple and powerful it actually is.
If you’ve ever struggled to connect your MetaMask wallet to a new blockchain network, you probably know how confusing it can get. That’s exactly where Chainlist comes in; it makes the process smooth, fast, and safe.
In this guide, I’ll walk you through how I used chainlist metamask techedubyte (inspired by tutorials from TechEduByte), what benefits I noticed, and a few mistakes you should avoid. My goal is to explain everything in simple, everyday English, no technical jargon, just what actually works.
So, whether you’re new to crypto wallets or already using MetaMask, this article will help you understand why Chainlist + MetaMask is such a game-changer for anyone diving into Web3.
What is Chainlist (and Why It Matters for MetaMask Users)
When I first heard about Chainlist, I honestly thought it was another complicated crypto tool. But after trying it, I realized it’s actually one of the simplest and most helpful platforms for MetaMask users.
Chainlist is a free online tool that helps you connect your MetaMask wallet to different blockchain networks safely and quickly. Normally, if you want to add a new network (like Binance Smart Chain, Polygon, or Avalanche), you have to manually copy things like RPC URLs, Chain IDs, and Network Names. That can be confusing and risky, especially if you get one detail wrong.
With Chainlist, you don’t need to do all that manually. You just open Chainlist org, search for the network you want, and click “Add to MetaMask.” Within seconds, it connects automatically and confirms the details for you.
I personally like how clean and easy the site is. There’s no extra setup, and it works perfectly with MetaMask. It also helps avoid fake or scam RPCs because Chainlist only lists verified networks.
So, in short:
Chainlist makes MetaMask setup faster, safer, and easier especially for beginners who don’t want to deal with complex settings.
What is MetaMask & How It Fits In
If you’ve ever dabbled in cryptocurrencies or Web3, you’ve probably heard of MetaMask. I remember my first time using it. I was a bit nervous because wallets can be tricky, but once I got the hang of it, I realized how powerful it is.
MetaMask is a crypto wallet that allows you to store, send, and receive digital assets. It also lets you interact with decentralized applications (dApps) on different blockchain networks. Basically, it’s your gateway to the Web3 world.
Now, you might wonder, “Why do I even need Chainlist if I have MetaMask?” Well, MetaMask is amazing, but adding new networks manually can be confusing. That’s where Chainlist comes in handy it helps you connect new networks to MetaMask in just a few clicks.
When I tried using Chainlist with MetaMask, I noticed it saved me a lot of time. Instead of manually entering RPC URLs and Chain IDs, I could simply select the network I wanted and click “Add to MetaMask.” Everything was verified, and I didn’t have to worry about mistakes.
In short:
- MetaMask is your wallet + access to dApps.
- Chainlist makes connecting new networks effortless.
- Together, they make managing crypto smoother, safer, and beginner-friendly.
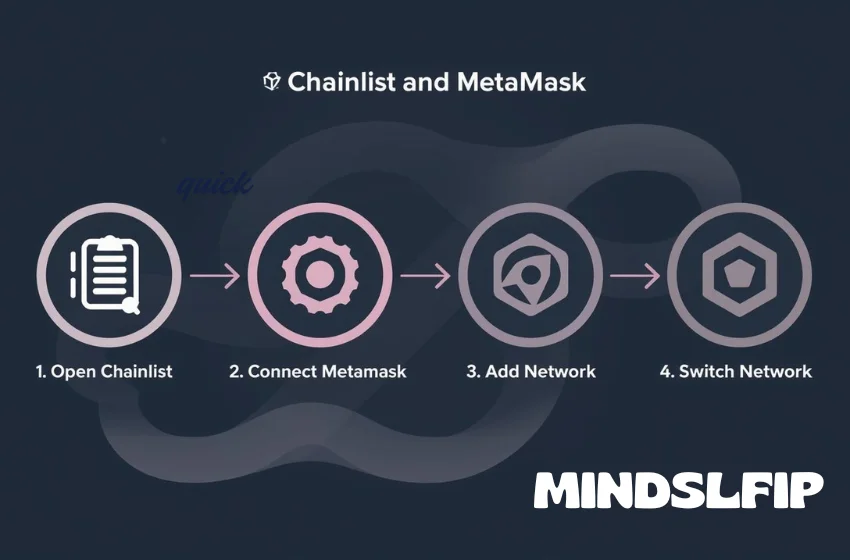
Step-by-Step: How I Used Chainlist + MetaMask
When I first decided to connect a new network to my MetaMask wallet, I wasn’t sure where to start. After a little research, I came across Chainlist, and it completely simplified the process. Here’s exactly how I did it:
- Open Chainlist
I went to Chainlist org and created an account. Even without signing in, you can browse networks, but signing in lets you track your activity. - Search for the Network
I typed the network I wanted in the search bar for example, Polygon. Instantly, I saw the verified network details: Chain ID, RPC URL, and network name. - Connect MetaMask
I clicked “Connect Wallet” on Chainlist. MetaMask popped up, asking for permission I approved it. This step is safe as long as you use the official Chainlist site. - Add the Network
Next, I clicked “Add to MetaMask.” MetaMask opened automatically and pre-filled all the details. I just had to click “Approve”. - Switch Networks
Once added, I switched to the new network inside MetaMask and saw my wallet ready to use on Polygon. No manual input, no mistakes just smooth and fast. - Double-Check Everything
I always double-check the network details: RPC URL, Chain ID, and currency symbol. This is a simple habit that prevents mistakes.
Benefits I Noticed (And You Will Too)
After using Chainlist with MetaMask a few times, I quickly realized how much easier it makes managing different blockchain networks. Here are the benefits I noticed and I think you’ll notice them too if you try it:
- Saves Time
Normally, adding a new network manually can take 5–10 minutes copying Chain ID, RPC URLs, network name, and currency symbol. With Chainlist, it took me less than a minute.
- Fewer Mistakes
Before using Chainlist, I once entered the wrong RPC URL and couldn’t connect. Chainlist pre-fills all verified information, so you don’t have to worry about typos or wrong details.
- Beginner-Friendly
Even if you’re new to MetaMask or crypto wallets, the process is super easy. I remember the first time I tried it I was able to add a network without watching any tutorial.
- Safer Connections
Chainlist only lists verified networks, so the risk of connecting to fake or scam networks is very low. That gave me confidence while exploring new chains.
- Flexible for Multiple Networks
If you’re like me and want to try different blockchains, switching networks in MetaMask becomes effortless. You can add many networks without messing up your wallet.
Security & Safety Tips I Learned
While using Chainlist with MetaMask is super convenient, I quickly realized that being careful is just as important as being fast. Here are some practical tips I follow to keep my wallet and networks safe and you should too:
- Always Use the Official Sites
I only go to Chainlist org and the official MetaMask app/extension. Scammers sometimes create fake sites, so double-check the URL before connecting.
- Verify Network Details
Even though Chainlist lists verified networks, I always glance at the Chain ID and RPC URL before adding. A quick check prevents mistakes or connecting to a wrong network.
- Keep Your Seed Phrase Safe
Your MetaMask seed phrase is like the key to your wallet. I never share it and always store it offline. If someone gets it, they can access all your funds.
- Approve Carefully
When MetaMask pops up to approve adding a network, I make sure the details match what I see on Chainlist. Never approve suspicious pop-ups.
- Test Small First
When trying a new network, I usually send a small transaction first. This helps me confirm everything works before committing bigger amounts.
- Stay Updated
I check TechEduByte and Chainlist updates occasionally. Crypto tools can change fast, so staying informed keeps me safe and confident.
First, I will tell you I personally use this, that’s why I share it. Please use Chainlist + MetaMask only if you are 18+, or at your own risk. It’s great for saving time and avoiding mistakes, but it’s not foolproof. Following the safety tips above ensures you stay in control.
When It Might Not Be Enough / Limitations
While using Chainlist with MetaMask makes life easier, it’s important to know that it’s not a magic solution for everything. Here’s what I noticed:
- Not All Networks Are Listed
Sometimes, the network you want isn’t available on Chainlist. In that case, you’ll need to manually add the network details into MetaMask. It’s not difficult, but beginners should be aware. - Riskier or New Chains
Some newly launched or less popular chains may carry more risks. Chainlist only verifies known networks, but always do your own research before adding unknown chains. - MetaMask Interface Quirks
I noticed that switching networks in MetaMask can occasionally be confusing, especially on mobile. It’s easy to select the wrong network if you have multiple networks added. - Manual Checks Are Still Necessary
Even though Chainlist makes adding networks faster, you still need to verify the network details before approving. A small mistake can create problems with transactions. - No Direct Support for Errors
If something goes wrong, Chainlist itself doesn’t offer direct support. You’ll need to troubleshoot MetaMask or consult community resources like TechEduByte or forums.
Conclusion: Is It Worth It?
After using Chainlist with MetaMask following TechEduByte tips, I can confidently say it’s worth trying especially if you want to save time, avoid mistakes, and explore multiple blockchain networks safely.
I tried adding a few networks myself, and the whole process was fast, simple, and beginner-friendly. Of course, it’s important to follow the safety tips I mentioned, double-check network details, and always use official sources. For more information like this visit Mindsflip
So, if you’ve been hesitating, I recommend giving it a shot. Using Chainlist MetaMask TechEduByte guidance made my crypto experience much smoother and I’m sure it will help you too.
Remember, Web3 tools can feel tricky at first, but a little practice goes a long way. With the right approach, connecting networks in MetaMask is no longer a headache.